728x90

이번에는 AWS Amplify로 인증부분을 연결해보자.
1. authentication service 만들기
amplify add auth진행하던 프로젝트에서 위 명령어를 입력
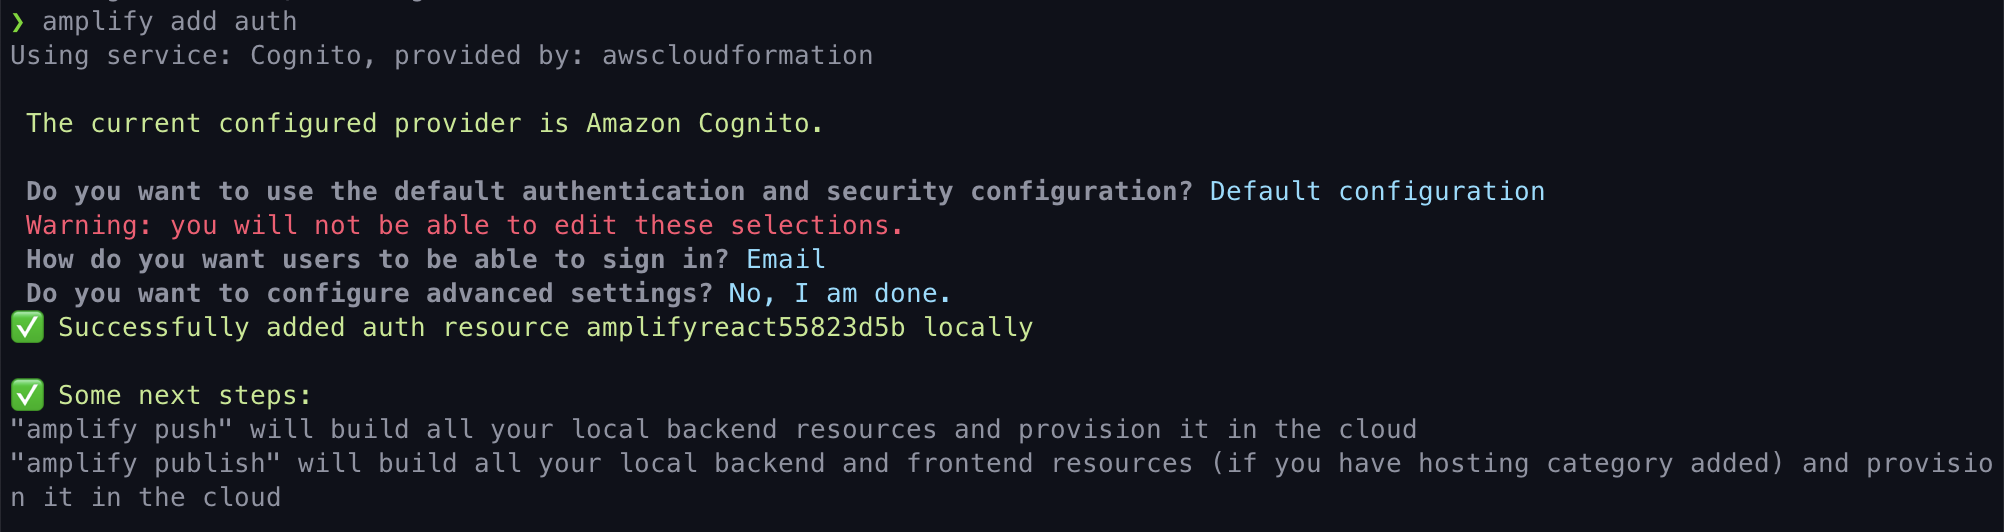
가이드에따라 자신이 원하는 방식으로 설정하면 amplify에서 자동으로 aws cognito와 연결해준다.
amplify push추가한 서비스를 배포하기위해 위 명령을 입력하면 인증 서비스가 배포된다.
amplify console프로젝트에 배포된 서비스를 확인하려면 위 명령어를 입력하면된다.
amplify statuscli에서 연결된 서비스를 확인하려면 위 명령어를 입력
2. 로그인 UI 생성
우선 최초에 프로젝트에 만들어진 필요없는 파일들을 지우자.
npm install aws-amplify @aws-amplify/ui-react두 가지 패키지를 설치한다.
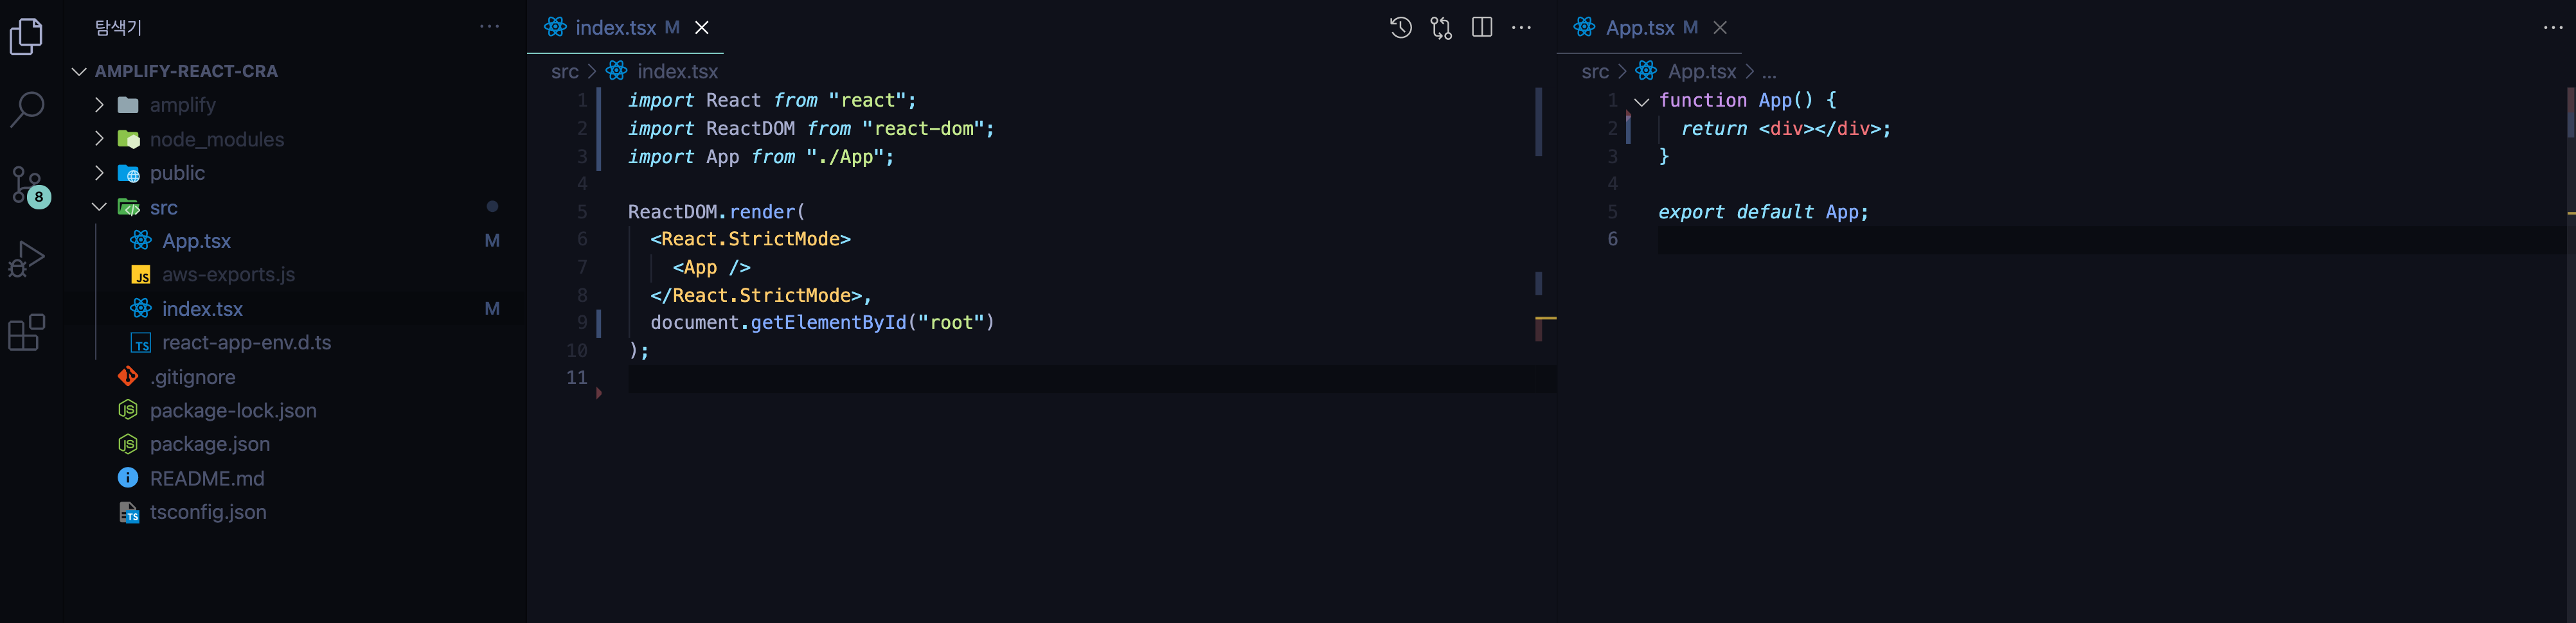
index.tsx를 아래와 같이 수정해준다.
import React from "react";
import ReactDOM from "react-dom";
import App from "./App";
import Amplify from "aws-amplify";
import awsconfig from "./aws-exports";

Amplify.configure(awsconfig);

ReactDOM.render(
  <React.StrictMode>
    <App />
  </React.StrictMode>,
  document.getElementById("root")
);
App.tsx를 아래와 같이 withAuthenticator HOC로 감싸준다.
import { withAuthenticator } from "@aws-amplify/ui-react";
function App() {
  return <div></div>;
}

export default withAuthenticator(App);
typescript를 이용할때는 aws-exports.js파일을 인식하지 못하기 때문에 아래와 같이 aws-exports.d.tx 파일을 만들어서 작성해주어야 한다.
declare const awsmobile: any;
export default awsmobile;
npm start를 이용해 로컬 서버를 실행해주면 아래와 같이 나온다.

지정된 브랜치(현재 main)에 git push 해주면 자동으로 배포된다.
728x90
300x250